Pass It Before You Take It: The Driver Tester, Now in 3D

Everyone remembers their road test, especially the parallel parking. The Driver Tester is our newest simulator, built to let you practice the maneuvers an examiner actually grades before you’re sitting in the car for real.

Seven scenarios are live: Parallel Parking, Three-Point Turn, Turns in Traffic, Driving in Traffic, Slippery When Wet, Changing Lanes, and Defensive Driving. Before you start, pick your vehicle: a Small Car, an SUV, or a Small Pickup. This isn’t cosmetic. Each one has its own length, width, and wheelbase, so a bigger rig turns wider and makes the same curbside space harder to hit.

Once you’re behind the wheel, it’s a full instrument cluster, not just an on/off toggle. Turn the ignition and let the engine settle to idle, then shift into D, N, or R. Try it while you’re still rolling or above 1,500 RPM and the dashboard warns you instead of grinding the gears. Steer with a three-turn, lock-to-lock wheel, and work the pedals for proportional gas and brake, just like a real car. Drive with the keyboard, the mouse, or a connected game controller.
Now You’re Actually in the Driver’s Seat

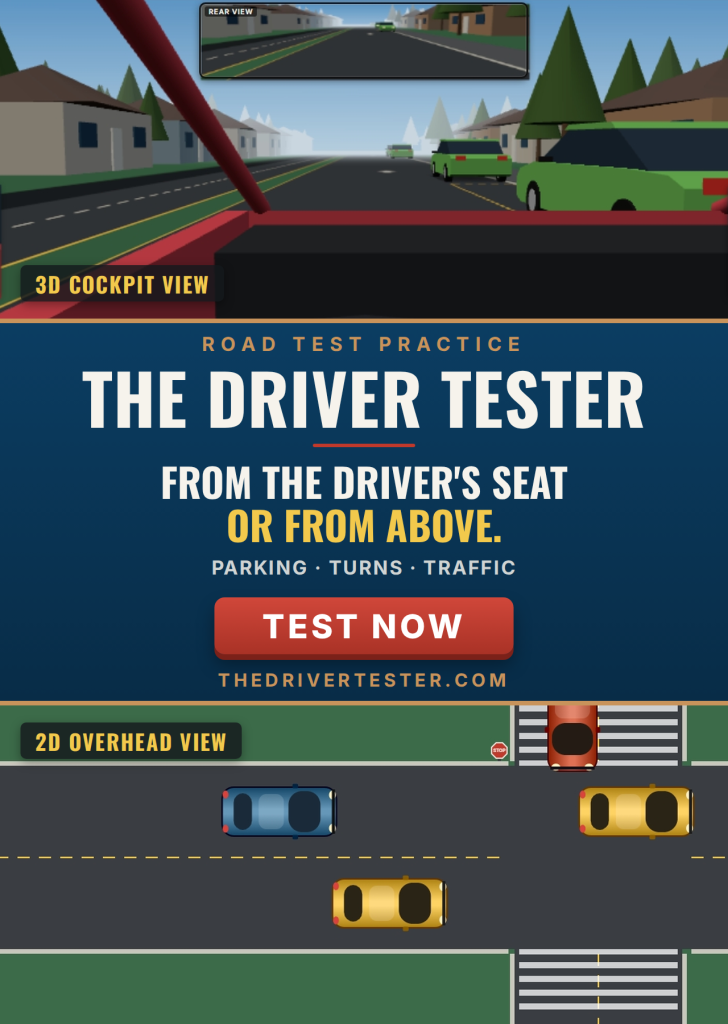
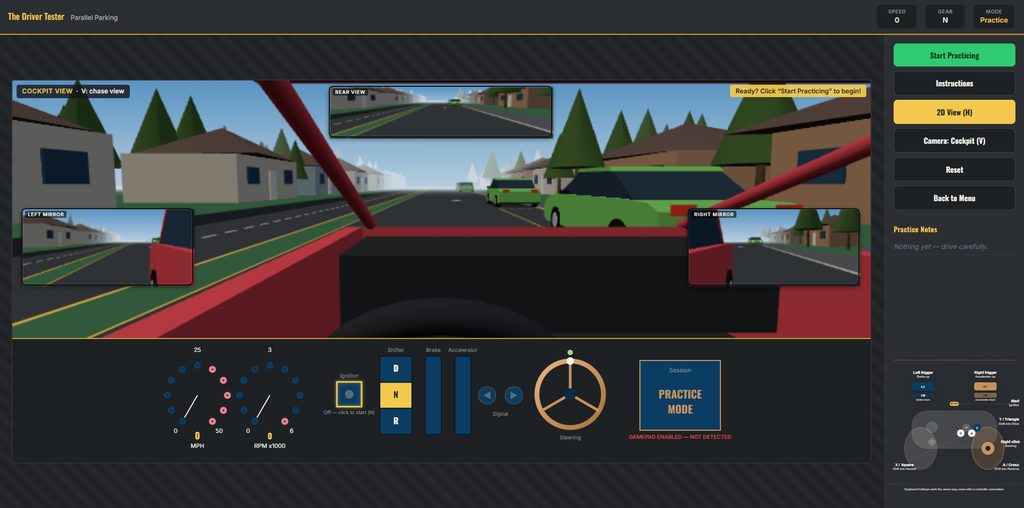
Every scenario now opens in a full 3D view from behind the wheel, with the same mirrors you’d be checking on a real road test.

  • Mirrors that work. A live rear-view mirror sits at the top of the windshield, and both side mirrors show what’s beside and behind you, including a sliver of your own car so you can judge distance the way you would for real.
  • A backup camera in Reverse. Shift into R and a backup camera appears on the dash, with guide lines that bend as you turn the wheel to show where the car is headed. It’s a huge help in Parallel Parking and the Three-Point Turn, where knowing which way to turn while backing is half the battle.
  • Shoulder checks. Hold A or F to glance out the side windows (it springs back when you let go), or drag the view to look around. Checking your blind spot before a lane change is now something you actually do.
  • Your car, your cockpit. The Small Car, SUV, and Small Pickup each get their own cab and seat height, and the steering wheel turns with yours.
  • The whole scene in 3D. Parked cars, traffic, stop signs, traffic lights (with the live signal lit), the SLIPPERY signs, the pedestrian, and a braking car’s brake lights all appear in 3D, on the same road you’d see from above.

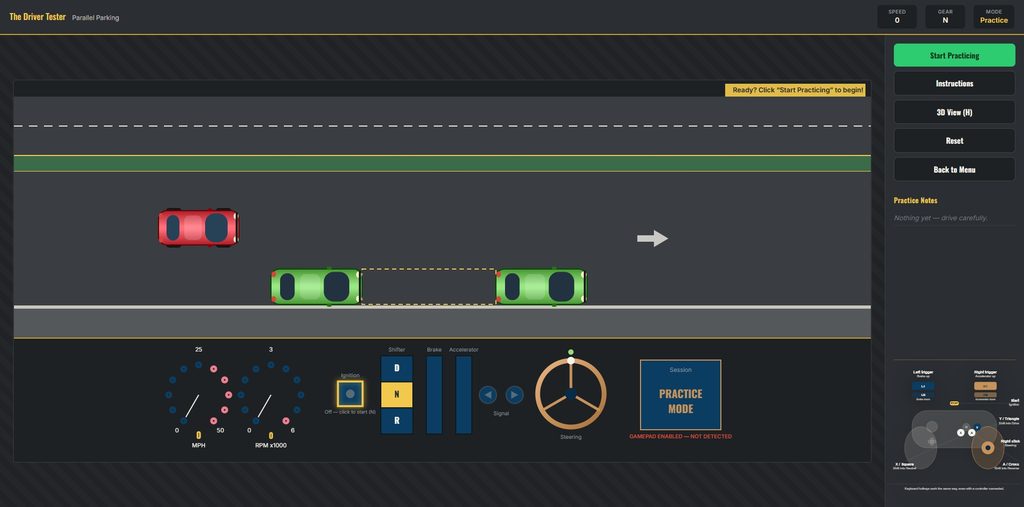
Press V to switch between the cockpit and a chase camera behind the car, and press H any time to go back to the classic overhead 2D view. On a controller, the View button switches between 3D and 2D, B changes the camera, and the left stick looks around.

The 3D view is simply another way of seeing the same simulation. The physics, the faults, and the scoring are identical whichever view you drive in, so practice however you learn best.

Think you’ve still got it? Pick your vehicle and find out.
How Scoring Works in The Driver Tester

Every scenario in The Driver Tester runs the same way: one continuous five-minute session, and the question is simply how many points can you score before the clock runs out? You need 100 cumulative points to pass, the same threshold in all seven scenarios. One clean maneuver is worth up to 100 points on its own, so a single perfect park passes outright, and several decent ones can add up to it too.

The five-minute clock only starts once you click the start button (Start Practicing, Start Driving, or Start this Turn), so starting the engine and getting settled beforehand doesn’t cost you any time.

The basic idea: faults live, each maneuver scored on the spot

Every scenario runs on the same scoring engine, and it comes down to two kinds of events:

Faults get deducted the moment you make them. Clip a curb, hit a parked car, run a red light, tailgate: the points come off immediately and show up in your fault log in real time, so you always know where you stand.

Each completed maneuver is scored automatically, the instant you finish it. There’s no button to click. The moment you’re stopped in the space, turned around, through the turn, around a lap, settled in your new lane, or through a hazard, that maneuver is graded and its points are banked. Then you just keep driving, and the next one scores fresh.

Your live score is the running total of every fault and every scored maneuver so far, floored at 0. When the five minutes are up, that total is your final result.

Each scenario grades its maneuvers on the same four-category shape (completion, precision, positioning, and efficiency), re-keyed to whatever that maneuver actually tests. Here’s the breakdown for each one.

Parallel Parking

Reverse into a curbside space between two parked cars. Each park is scored the moment you’re fully in the space and stopped; pull back out and park again to score again.

  • +40: parked fully within the marked space, with no faults active
  • +20 / +10: aligned parallel to the curb, within 8° / within 18°
  • +20 / +10: good / acceptable distance from the curb
  • +20 / +10: did it in 3 or fewer / 5 or fewer direction changes (pull-ups) since your last park
  • −15: each collision with a parked car
  • −10: each curb strike, and each time you leave the roadway

Three-Point Turn

Reverse direction on a narrow residential street. It’s deliberately too tight for any vehicle’s turning radius, so you have to reverse at least once. Each turnaround scores the moment you’re facing the other way.

  • +40: ended up facing roughly the opposite direction (within 30° of a clean 180) and back on the road, no faults active
  • +20 / +10: facing squarely / roughly the opposite direction (within 8° / 18° of exactly 180°)
  • +20 / +10: ended well / reasonably centered in the lane, not hugging a curb
  • +20 / +10: did it in 2 or fewer / 4 or fewer direction changes (2 or fewer is a textbook three-point turn: pull forward, reverse, pull forward again)
  • −15: hitting the mailbox
  • −10: each curb strike, either side

Turns in Traffic

Judge a safe gap in oncoming traffic and turn left at a signalized intersection. Each turn scores the moment you’ve cleared the intersection into the cross street.

  • +40: completed the turn facing roughly the right direction (within 30° of due north), landed in the cross street, never collided with traffic, and didn’t run the red light
  • +20 / +10: facing squarely / roughly north once the turn is done (within 8° / 18°)
  • +20 / +10: landed cleanly / reasonably close to centered in the correct lane of the cross street
  • +20 / +10: took a safe (3.0+ seconds) / workable (1.5+ seconds) gap in oncoming traffic, judged the instant you cross the centerline
  • −40: colliding with an oncoming car (you’re sent back to the start line to try again)
  • −15: entering the intersection on a red light (this also cancels that turn’s +40)
  • −10: leaving the roadway

Driving in Traffic

A continuous drive rather than a single maneuver: keep your distance and hold your lane. Each lap of the road is scored as you complete it.

  • +40: completed the lap without a serious incident (no collision, no curb strike, never off the roadway)
  • +30 / +15: stayed centered / mostly steady in your lane, on average over the lap
  • +30 / +15: kept a clean / mostly clean following distance (zero, or 2 or fewer, tailgating faults during the lap)
  • −40: colliding with another car (you’re sent back to the start line to begin the next lap fresh)
  • −15: colliding with the stopped car waiting at the cross street’s stop sign
  • −10: leaving the roadway
  • −10: following too closely (continuous tailgating only logs once every few seconds, not every instant)

Slippery When Wet

The same drive as Driving in Traffic, with the same scoring, on a road with three wet patches that cut your tires’ grip. There’s no separate “wet patch” score: the patches just make it easier to slide off the road, close up on the car ahead, or hit someone, and a clean lap correspondingly harder to bank. Slow down before the SLIPPERY signs.

Changing Lanes

Signal, pick a gap, and move over. Each lane change scores the moment you’ve settled, driving straight again, in the new lane. Change your mind halfway and swing back, and nothing is scored or penalized.

  • +40 / +10: signaled the correct direction at least half a second before you started across, and completed the change without a fault / completed it cleanly but without the right signal on in time
  • +20 / +10: took a safe (3.0+ seconds) / workable (1.5+ seconds) gap in the target lane, judged the instant you start across
  • +20 / +10: settled centered / reasonably close to centered in the new lane
  • +20 / +10: crossed decisively (1.2 seconds or less) / without taking too long (2.5 seconds or less)
  • −40: colliding with another moving car (you’re sent back to the start line)
  • −15: colliding with the stopped car at the cross street’s stop sign
  • −10: leaving the roadway
  • −10: following too closely
  • −10: lingering across the lane line for more than 3 seconds

Defensive Driving

Drive normally, and every 12 to 25 seconds something goes wrong: the car ahead brake-checks you, a pedestrian darts off the shoulder into your lane, or the car at the stop sign pulls out in front of you. Each of these opens a six-second reaction window, and your reaction is scored when it closes.

  • +40 / +15: got through the reaction window without a fault / got through it, but with one
  • +20 / +10: already had a safe (3.0+ seconds) / workable (1.5+ seconds) following gap when the hazard started. This is anticipation: it’s judged before you can react, so a good following habit pays off and tailgating costs you, however quick your reflexes.
  • +20 / +10: braked under control (peak brake 60% or less) / hard but not floored (under 90%)
  • +20 / +10: if you swerved into the other lane, took a safe / workable gap to do it. If you never needed to leave your lane, you get the full +20.
  • −80: striking the pedestrian (you’re sent back to the start line)
  • −40: colliding with another moving car, including the stop-sign car once it has pulled out (you’re sent back to the start line)
  • −15: bumping the stop-sign car while it’s still waiting
  • −10: leaving the roadway
  • −10: following too closely

A couple of things worth knowing

Repeated continuous contact (sitting on a curb, leaning on a parked car) doesn’t spam your fault log every instant. Each fault logs once per new contact, only the moment you make it.

A collision with moving traffic is the most expensive mistake on the road, but it doesn’t end your session. It costs you the points, sends you back to the start line, and any maneuver or reaction you were in the middle of goes unscored. Then the clock keeps running, and you can still drive your way back to 100.

Running out the clock is never a fault. It’s just the end of your session, and whatever total you’ve built by then is your final score. Pausing freezes everything (the clock, the traffic, and the scoring) until you resume.

Pick your vehicle, check your mirrors, and see if you’d pass. No download required.

Please email your questions or comments to theboatdocker@gmail.com
Mastered the Dock? Try Drag racing

Green Light, Full Send: Racing The Drag Car Racer

There’s nothing quite like the moment the Christmas tree flashes green, and nothing quite as embarrassing as red-lighting before it does. The Drag Car Racer, our newest simulator, puts you on a real quarter-mile strip with the other lane lined up against you and nothing between you and bragging rights but a clean launch and a well-timed shift. At first, that other lane is the CPU. Once you’ve got a few clean runs in, it’s you.

And now you’re not watching it from the grandstands. You’re in the driver’s seat.

Strap In: The 3D Driver’s View

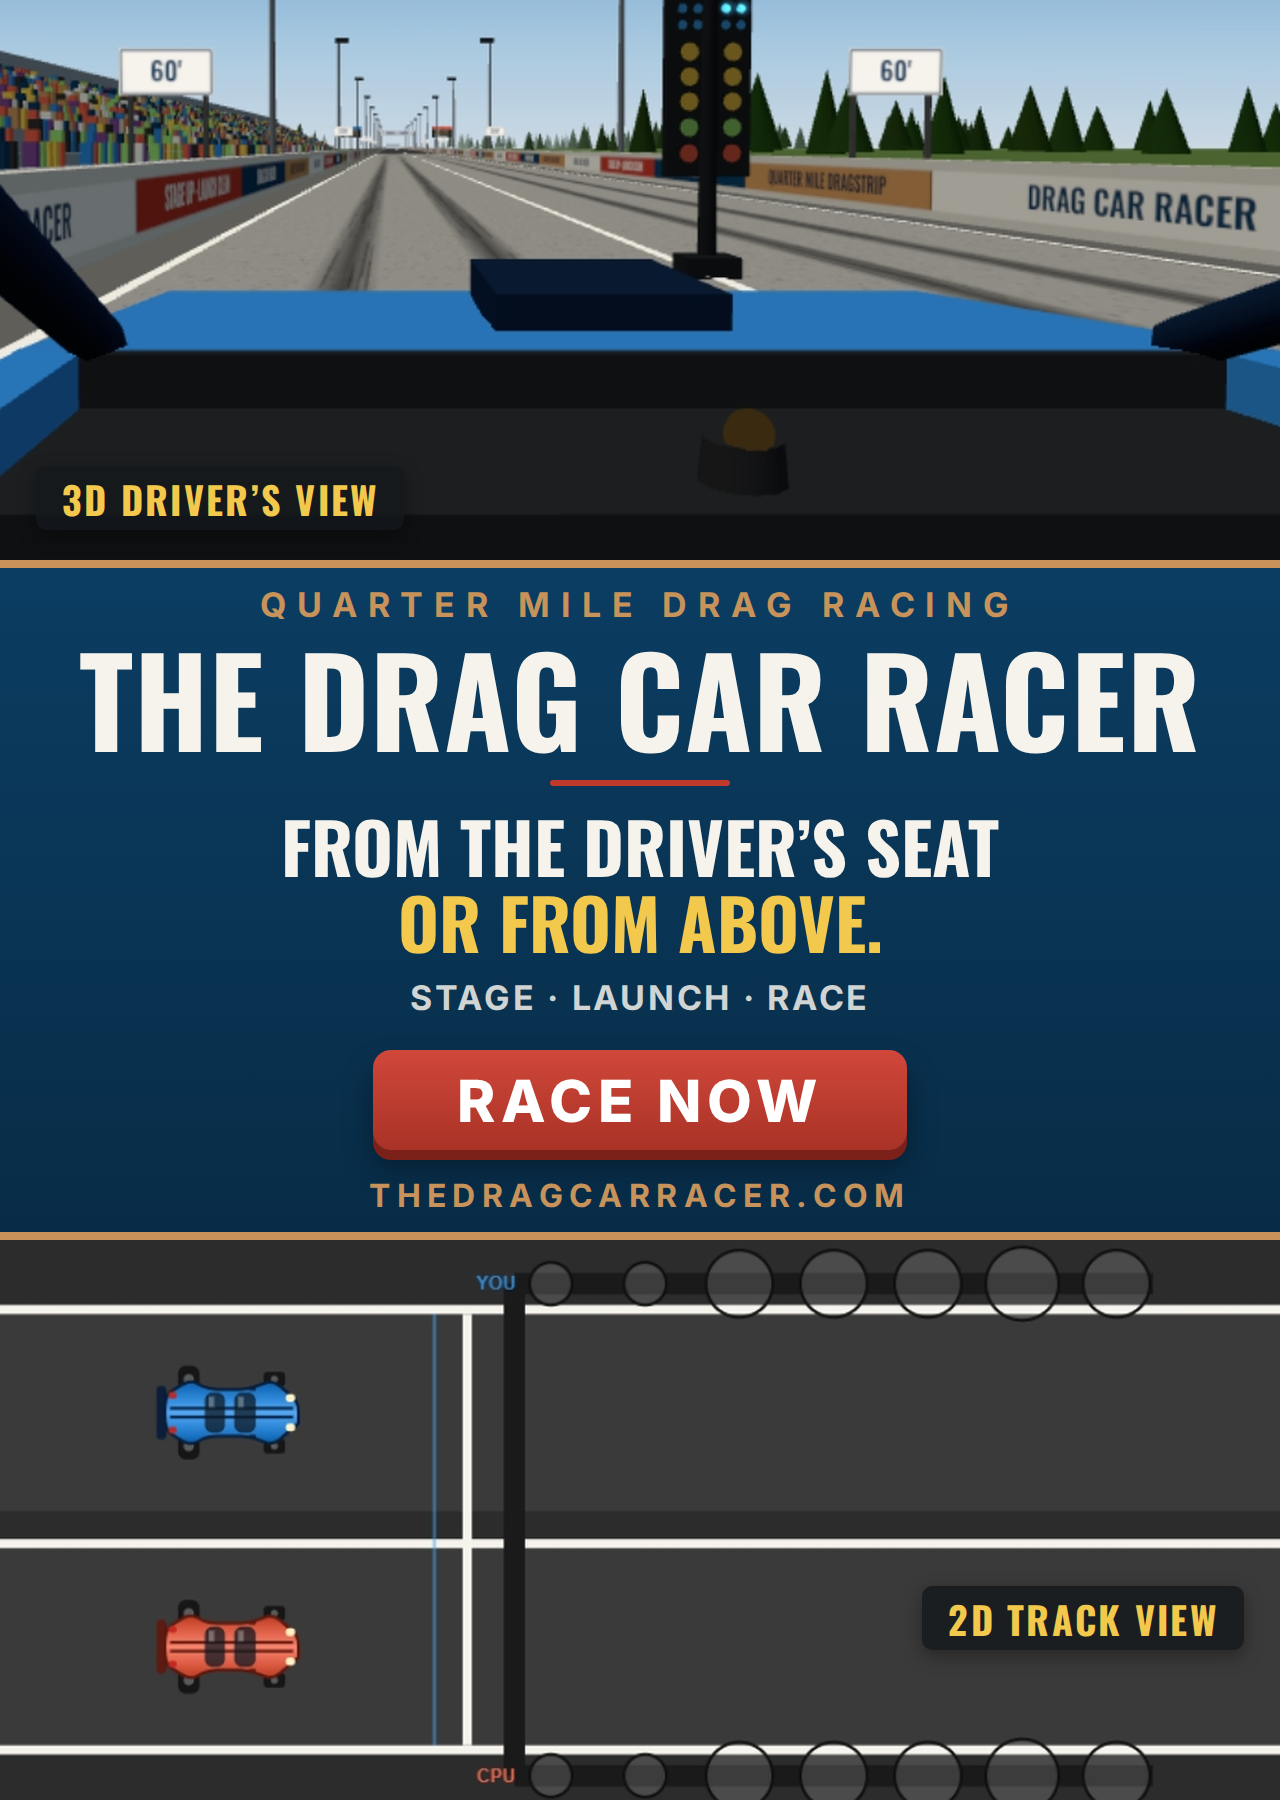
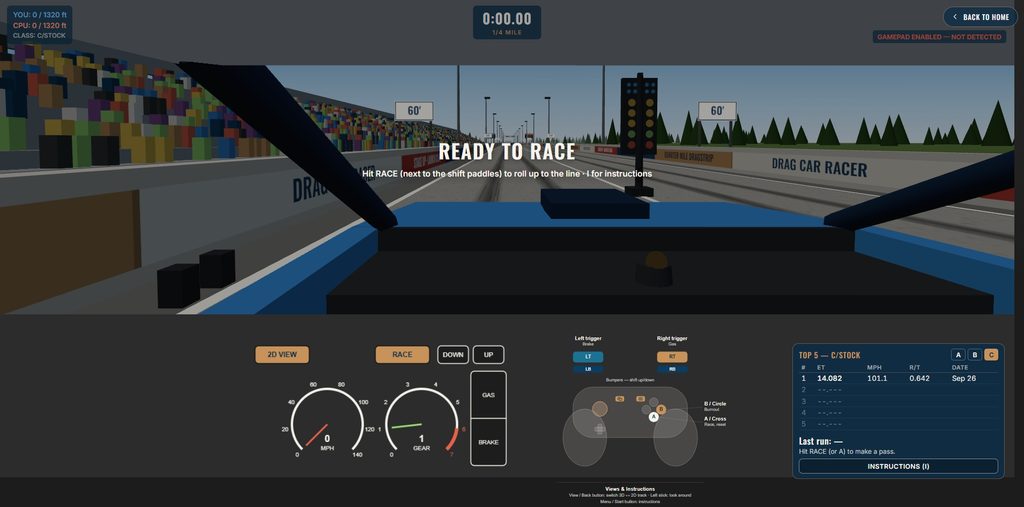
The Drag Car Racer opens in a full 3D first-person view from behind the wheel. The hood stretches out ahead of you, the Christmas tree stands just off your right fender, and your opponent idles in the next lane. The whole quarter mile runs out to the checkered finish gantry. There are distance boards at 60, 330, 660 and 1,000 feet, rubbered-in grooves down each lane, a packed grandstand, and scoreboards at the finish that post each lane’s reaction time, ET and trap speed the moment you cross.

It’s built to feel like a pass, not just look like one:

  • A shift light on the dash glows amber right at the 5,300 RPM power peak and flashes red when you’re bouncing off the limiter, so you can keep your eyes on the strip instead of the tach.
  • The car reacts. The nose lifts when you launch, dips when you brake, and kicks on every upshift. The whole car shakes through a burnout, with tire smoke rolling off the rear slicks.
  • Look around. Tap ← or → to turn your head one step at a time (45°, 90° out the side window, then 150°) and the view stays put until you tap the other arrow to come back toward center. You can also drag the view with your mouse, or use the left stick on a controller, which springs back when you let go.
  • A proper shutdown. Cross the stripe and you roll on down the shutdown area and brake to a stop. The car doesn’t slam to a halt on the finish line.

Prefer the classic overhead layout? Press H (or the controller’s View button) to switch between the 3D Driver’s View and the 2D track view at any time, even mid-run. The race is identical either way; only your seat changes.

Pick Your Class, Then Stage Up

Start by picking your class. Vehicles are bracketed by power-to-weight, the same way real NHRA Stock subclasses work: A/Stock is the quickest, C/Stock the most forgiving, with B/Stock splitting the difference. Lighter pounds-per-horsepower means a faster car — and a harder car to launch clean.

Staging is where races are won or lost. Roll forward carefully to light your pre-stage and stage bulbs, wait for your opponent to do the same, then hold your nerve through the ambers. From the driver’s seat you’re watching the actual tree, just like the real thing. Jump the green and it’s an automatic red-light foul — no time recorded, race over. Get a clean light and you’re free to work the 5-speed manual, paddle-shifting through the gears and chasing that 5,300 RPM sweet spot, just shy of the 6,000 RPM redline. Feeling bold? Throw in a burnout before you stage for a launch-power bonus.

First car to cross the stripe at 1,320 feet wins. Your result posts right on the dashboard: win or loss, your ET, trap speed, reaction time and the CPU’s time. There’s no pop-up to dismiss. Hit RACE and go again.

Race Your Own 3rd Best

Beating the CPU is a good start. Beating yourself is the real test.

Your first three clean runs in a class are against the CPU car. After that, the other lane becomes Your 3rd Best: a replay of the third-fastest time on your leaderboard for that class. It leaves the line at that run’s reaction time, crosses the stripe at exactly that run’s elapsed time, and posts that run’s trap speed, so its time slip matches the leaderboard row to the thousandth. The tree, the scoreboards and the result panel all label it, so you always know who you’re racing.

Here’s the clever part: your 3rd best is picked fresh every time you reset. Beat it, and your new time pushes onto the board, so the next opponent is a little quicker. The bar only goes up. Before each run, the dashboard tells you either how many clean runs you still need to unlock it, or exactly which time you’re about to race.

Red-light runs are never saved, so every time on the board, and every rival you face, comes from a clean pass. Your times stay right in your browser on your own device. There are no accounts and no names to type in.

Controls

Keyboard, mouse, or a connected controller all work:

  • Gas / brake: Up arrow, W or Space / Down arrow or S (controller: right and left triggers)
  • Upshift / downshift: E or ] / Q or [ (controller: right and left bumpers)
  • Burnout (before staging, once per run): B (controller: B / Circle)
  • Race / reset: the on-track button (controller: A / Cross)
  • Switch 3D / 2D view: H (controller: View button)
  • Look around in 3D: tap ← / →, or drag with the mouse (controller: left stick)
  • Instructions: I, or the Instructions button on the dashboard (controller: Menu)

The instructions stay out of your way until you want them.

Think you can run a 12 in C/Stock, or crack 11 seconds in A/Stock? Head to the strip and find out.

How Scoring Works on the Quarter Mile Dragstrip

The dragstrip breaks from every other scoring model on the site. Parallel Parking, the Three-Point Turn, and the Trailer Parker’s backing sessions all reduce your performance to a rubric: faults subtracted, bonuses added, a pass threshold to clear. The dragstrip throws that whole approach out. There’s no point log and no 100-points-to-pass line. You get a stopwatch. Your score is your elapsed time from the green light to the stripe, and the only things to beat are the car in the other lane and your own best times, which, once you’ve unlocked Your 3rd Best, are the same thing.

A leaderboard for every class

The dashboard carries an always-on leaderboard showing the top five times for your class, ranked fastest first. Each entry shows the ET to the thousandth of a second, trap speed, reaction time and date. A/, B/ and C/Stock each keep their own board, so a C/Stock run is never buried under A/Stock times, and your 3rd-best rival always comes from the class you’re driving. Tabs let you peek at the other classes whenever you want to see what the quicker cars are running. Crack the top five and your new time lights up with its rank.

No partial credit: a foul is all or nothing

Everywhere else, a mistake costs points but the attempt keeps going. Clip a curb mid-turn and you can still limp to a passing score. The dragstrip doesn’t work that way. Jump the light, touching the throttle before the green even by a hair, and the run ends immediately with no time recorded at all. It doesn’t matter how good your reaction time would have been; a red-light foul erases the run rather than docking it.

That same all-or-nothing rule extends to staging itself, in a bit of realism borrowed straight from NHRA rules: once your opponent has crossed a staging beam, you’ve got 7 seconds to cross it too, or it’s an automatic foul for taking too long. Dawdling on the way to the line is treated exactly like jumping it. Both are just “foul,” with nothing recorded either way.

The burnout is a bonus with no downside

Most bonuses in these games reward something you had to do carefully, like parking within tolerance or staying centered in a lane. The dragstrip’s one bonus breaks that pattern: a pre-stage burnout costs you nothing. It happens before the clock starts, so it doesn’t eat into your race time, and it hands you a fading power boost right at launch, a real advantage for the price of remembering to tap a button beforehand. There’s no version of “burnout gone wrong” that costs you anything. It’s pure upside, one per run. (In the 3D view it’s also the most satisfying button in the game.)

The one place engine physics really matters

Every other simulator on the site cares about position and heading. The dragstrip is the only one where the engine itself is part of the skill test. Shifting is tuned against a real torque and power curve rather than a flat one. Torque peaks at 3,000 RPM, but power, the thing that actually determines acceleration, keeps climbing until 5,300, and the last 700 RPM to the 6,000 redline actually costs you output as the engine runs out of breath. Riding every gear all the way to the limiter, which feels like the “floor it” instinct, is the wrong move. Short-shifting and redlining both leave time on the table, and the fastest runs live in the narrow band in between. That’s exactly the band the dash-mounted shift light marks for you.

A quietly authentic classing system

The vehicle classes on the setup page aren’t just difficulty labels. They’re built from real NHRA Stock subclass brackets, classed by power-to-weight in pounds per horsepower, with each class’s power derived the same way real drag classing works: for a fixed weight, power is inversely proportional to lb/hp. That’s why every class gets its own leaderboard, and its own 3rd-best rival. The times aren’t meant to be compared across classes, any more than they are at a real track. It’s a level of real-world grounding none of the parking or turning scenarios attempt, and it sits under what’s now the most immersive seat in the collection.

Stage up, watch the tree, and send it. No download required.

Please email your questions or comments to theboatdocker@gmail.com
Back It In Like a Pro: The Trailer Parker, Now in 3D

Backing a trailer into a tight space looks easy until you’re the one behind the wheel, watching it swing the wrong way while someone waits. That’s the problem The Trailer Parker solves: a free browser-based simulator for practicing truck-and-trailer backing without denting a fender or blocking traffic.

Start by picking your challenge: nine lot layouts, from a forgiving Standard Lot to a Pedestrian Crossing, a Lot with Bollards, three levels of Moving Traffic, or a full Obstacle Course. Then match your rig to your real-world experience, or make it harder on purpose, with three trailer weights: Light (utility hauler), Medium (car hauler), or Heavy (boat hauler).

Once you’re in the seat, everything behaves like a real vehicle. Turn the ignition, ease onto the throttle, and watch the RPMs climb through a genuine engine model. Steer with a three-turn, lock-to-lock wheel, shift between forward, neutral, and reverse only once stopped, and drive with keyboard, mouse, or a connected game controller.

Now You’re Actually in the Cab

The Trailer Parker now opens in a full 3D view from the driver’s seat, and the camera follows your shifter, because backing a trailer is a different job from driving forward.

  • In Forward, you’re behind the wheel looking out over the hood, with your side mirror showing a live view of the trailer tracking behind you.
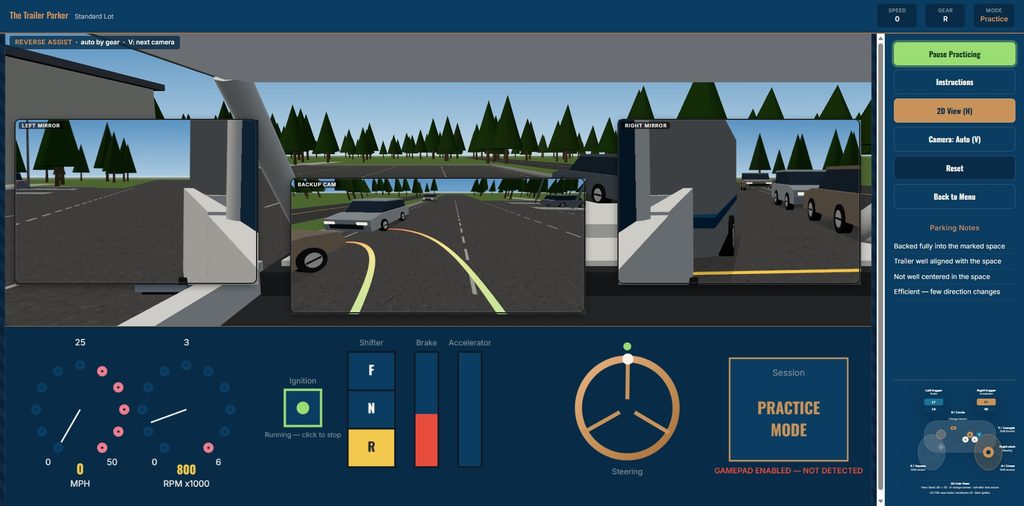
  • Shift into Reverse and the view changes the way a real driver’s attention does. Both side mirrors grow into large live panels, so you can watch each side of the trailer as it swings. A backup camera mounted on the back of the trailer appears on the dash, showing the marked space behind you.
  • The backup camera draws your path. Colored guide lines trace where the trailer’s rear corners will go if you keep the wheel where it is: green close in, amber, then red farther out. Turn the wheel and watch the lines bend. It’s the fastest way to build the “which way do I turn?” instinct that makes backing so hard to learn.
  • A hitch-angle warning tells you when the trailer is folding too sharply: amber when it’s getting tight, red JACKKNIFE when it’s time to pull forward and straighten out.
  • The marked space lights up green once the trailer is in it, straight, and stopped.

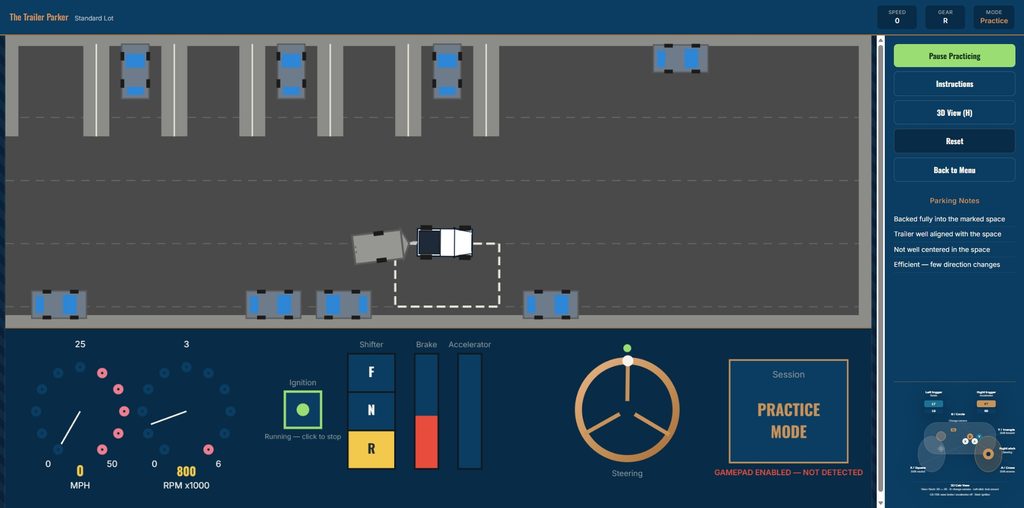
Want a different angle? Press V to cycle between the cab view, reverse assist, a full-screen backup camera, and an overhead drone view of the whole rig. Your pick holds until your next shift, then the view follows the gear again. Hold A or D to glance out the side windows, and press H any time to switch back to the classic overhead 2D view. On a controller, the View button switches 3D and 2D, B changes the camera, and the left stick looks around.

The 3D view is purely a way of seeing the same simulation. The physics, the faults, and the scoring are identical whichever view you drive in, so practice however you learn best.

Score Yourself, or Just Practice

Every attempt scores itself automatically: up to 100 points for getting fully within the space, staying aligned, centering yourself, and keeping direction changes to a minimum. Bank 100 cumulative points before the five-minute clock runs out, and you’ve passed. Just want to work on your backing with no clock and no points? Turn Timer & Scoring off on the Setup page for Practice Mode.

Whether you’re a new driver building confidence or a seasoned trucker looking for a warm-up, The Trailer Parker gives you unlimited attempts and zero real-world consequences. Fire it up, climb into the cab, and see how many points you can bank.

How Scoring Works in The Trailer Parker

The Trailer Parker runs on a different rhythm than a single graded maneuver: you get one continuous five-minute session, and the question is simply how many points can you back in before the clock runs out? You need 100 cumulative points to pass, and nothing stops you from backing in, pulling out, and doing it again as many times as there’s time for. Every completed park adds to your running total.

The basic idea: faults live, each completed park scored on the spot

Like the shared scoring engine, this comes down to two kinds of events:

Faults get deducted the moment you make them. Clip a curb or island, knock over a bollard (or a cone, on the Obstacle Course), collide with a parked or moving vehicle, or strike the pedestrian, and the points come off immediately and show up in your fault log in real time.

A completed park gets scored automatically, the instant you finish one. There’s no “Grade My Attempt” button to click mid-session. The moment the trailer is fully within the marked space, aligned to it, and essentially stopped, checkAttemptCompletion() recognizes it and banks the points right then. (In the 3D view, that’s the moment the space turns green.) You keep driving afterward; pull back out and park again and it scores again.

Your live score is the running sum of every fault and every completed park’s bonus so far, floored at 0. When the five minutes are up, that cumulative total is your final score.

Scoring a completed park: 40/20/20/20

Every time you finish a park, it’s graded on the same four-category breakdown:

  • +40: backed fully into the marked space, with no faults active
  • +20 / +10: trailer well / roughly aligned with the space’s target heading (within 8° / 18°)
  • +20 / +10: well / reasonably centered within the space
  • +20 / +10: did it in 3 or fewer / 5 or fewer direction changes (forward/reverse shifts) since your last completed park

Pull out and go again, and the direction-change count resets, so lining up a second (or third, or fourth) park cleanly is scored fresh each time, independent of how the last one went. This is where the backup camera’s guide lines earn their keep: set the wheel so the path lands in the space before you start rolling, and you’ll use far fewer direction changes.

Faults

These apply live, throughout the whole session, regardless of how many parks you’ve completed:

  • −10: hitting a curb, lot boundary, or island
  • −10: striking a bollard (or a cone, on the Obstacle Course)
  • −15: colliding with a vehicle, either a parked one or the moving traffic vehicle on the lots that have it
  • −40: striking the pedestrian (or the jogger, on the Obstacle Course)

Each fault type only logs once per new contact, so leaning on an obstacle or resting against a curb doesn’t spam the log every tick, only the moment you first touch it. Any contact also bleeds off your speed, so plowing into something costs you momentum on top of the points.

What changes from lot to lot

The lot you pick (from the Setup page) changes what you’re navigating around, not how scoring works. The fault categories and the 40/20/20/20 park breakdown are identical everywhere:

  • North Row / South Row / Standard Lot: straightforward layouts with islands and parked vehicles to navigate between.
  • Lot with Bollards: adds fixed posts as an extra obstacle.
  • Pedestrian Crossing: a pedestrian wanders the lot (click anywhere to send them walking there, in either view), adding a live, less predictable hazard. Keep an eye on the backup camera; it’s the first place you’ll spot someone stepping behind the trailer.
  • Slow / Medium / Fast Moving Traffic: a vehicle continuously drives through the lot at one of three speeds, on top of the usual parked-vehicle and boundary hazards.
  • Obstacle Course: a proper slalom, with alternating cones to weave through, a narrow two-cone gate to finish, and a jogger crossing partway along. Bollard hits here are logged (and shown) as knocked-over cones instead.

Tow weight (Light/Utility, Medium/Car Hauler, Heavy/Boat Hauler) is a difficulty setting, not a scoring one. A heavier trailer accelerates and brakes more sluggishly, but the point values above don’t change based on what you’re towing. The same goes for your view: 3D or 2D, cab or drone, the scoring is exactly the same.

Ending the session

The five-minute clock only starts once you click “Start Practicing”, so warming up the engine and getting oriented beforehand doesn’t cost you any time. Pausing (or the instructions modal auto-pausing for you) freezes everything, faults and the clock included, until you resume. When time runs out, your cumulative score, every fault and every completed park added together, is locked in as your final result, checked against the 100-point pass threshold.

Climb in, shift into reverse, and back it in. No download required.

Please email your questions or comments to theboatdocker@gmail.com
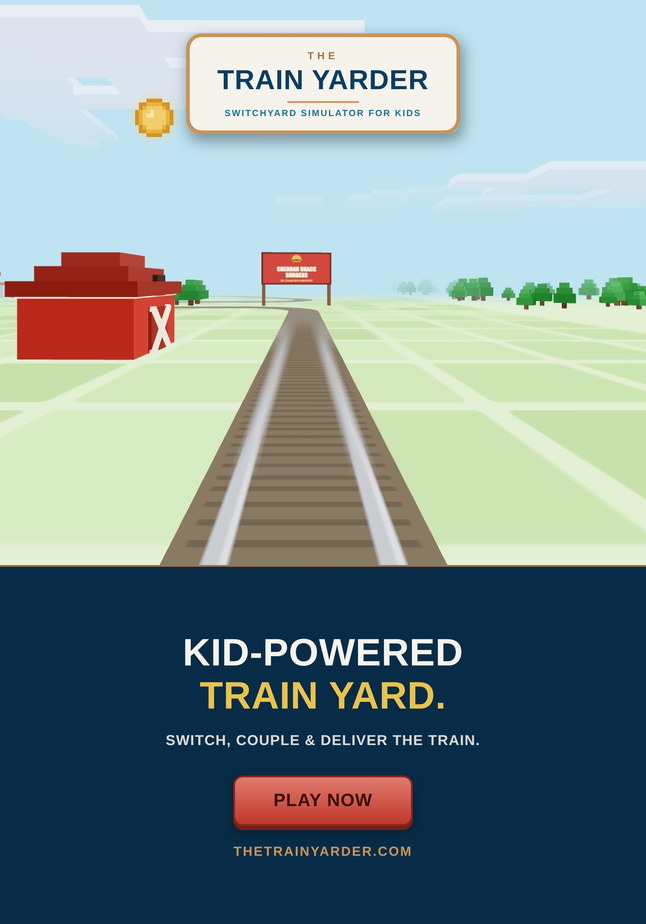
Every Car in Its Place: Meet The Train Yarder

If you’ve ever watched a freight train and wondered how all those mismatched cars ended up traveling together, the answer is a rail yard. The person running it is a yarder.

A yarder’s job is switching. Cars arrive from all over, mixed up, and the yarder sorts them into the right order for where they’re headed next. That means throwing switches to line up the right track, coupling cars in sequence, and spotting each car in exactly the right place. Not the spot next to it, and not “close enough.” The right one.

How it works

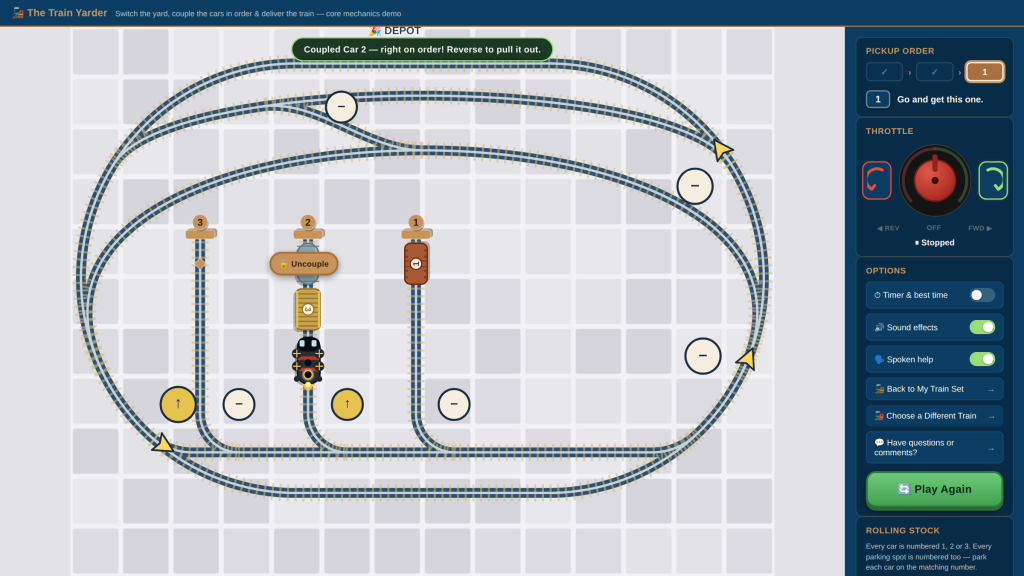
Your young engineer starts by choosing an engine and three cars, then decorates the layout with a windmill, a barn, a water tower or a church. Each car carries a number, and a pickup-order card shows which one to fetch first. From there it’s real switching: drive into the yard, back up to a car and couple it gently. Then go get the next one, in order, and take the finished train to the depot.

A real yarder’s shift doesn’t end at delivery, so neither does ours. Once the train is in, it’s time to uncouple and put every car back on its own numbered, color-matched spot.

Help that knows what went wrong

There’s no reading required and no rush. A friendly voice walks kids through each step. When something goes sideways, it doesn’t just say “try again.” It says what happened: that car’s out of order, you rolled past your spot, the engine went in first, or ease off, you’re going too fast. A small mistake becomes a small lesson, and the puzzle stays fun instead of frustrating. Kids who are ready for a challenge can turn on the timer and try to beat their best time.

Part of a bigger train set

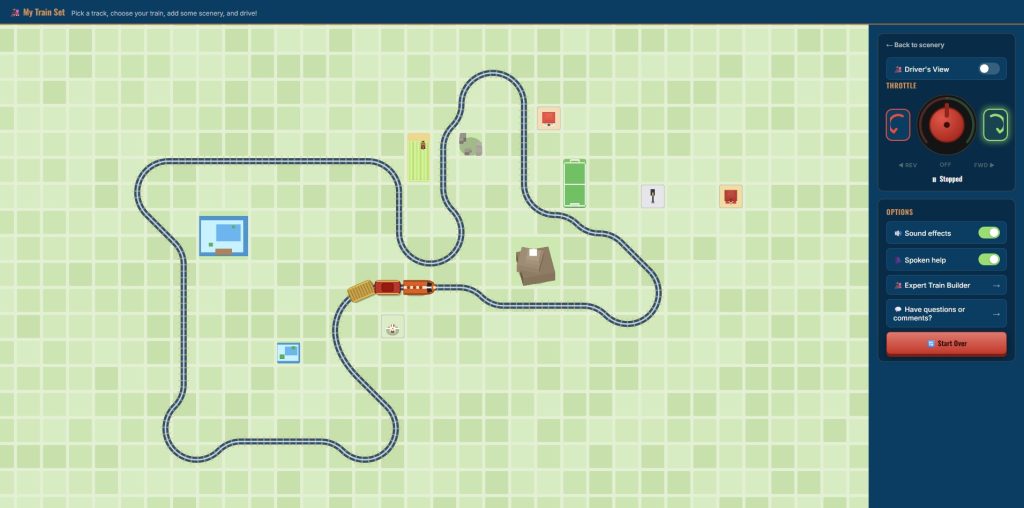
The Train Yarder is one corner of My Train Set. Kids can also just drive: pick a ready-made track, build a train of two to four cars, add scenery and ride along in the driver’s-eye view. Or they can build their own track piece by piece, straights and curves, until the loop connects back to the station, then name and save their design. Each mode can be added to a tablet’s home screen and opens full screen, like a real app.

It’s a small job in real railroading. But for a young engineer finding out how trains actually work, it’s the perfect first one.

Please email your questions or comments to theboatdocker@gmail.com
Raising the Next Generation of Boaters, One Dock at a Time

Docking is the moment every new boater dreads. It’s the part of boating you can’t really learn from a manual, and the part where a bad day plays out in front of an audience at the marina. Most people’s first real practice happens with a rental full of strangers watching. That’s backwards, and it’s exactly the gap The Boat Docker is built to close.

The Boat Docker is a free, browser-based docking simulator — no install, no account, just open it and go. It puts you behind a full instrument panel: separate or integrated engine controls, a real multi-turn rudder wheel, bow and stern thrusters, and the wind and current working against you the whole time. Nine scenarios, from calm North- and South-facing docks to mooring buoys, a boat trailer, passing traffic crossing your lane, a man-overboard rescue and a fishing run, let a new boater build the instincts that usually only come from expensive, high-pressure time on the water.

Now you can take the helm

Docking from above is one skill. Docking from the captain’s seat is the real one. With Helm View, one press of H puts you behind the wheel in 3D: the bow and windshield in front of you, the pilings and moored boats sliding past, and the wheel turning in your hands as you steer. Turn your head to look over the rail at your fenders and the dock alongside, then tie off right from there. Press H again and you’re back to the bird’s-eye view. It’s the same boat and the same moment, so you can switch views mid-approach whenever you want the big picture.

A coach riding along

The Boat Docker now talks back. Engines hum up and down with the throttles, thrusters whine, water rushes past the bow as you pick up speed, and you’ll hear every bump. A spoken coach rides along too, keeping it short and to the point: “Easy. Too fast for the dock.” “Line ready. Now pick a cleat.” “Secured and snugged up. Excellent docking.” Sound and voice each have their own switch, so you can practice however you like.

Try, fault, adjust, try again

Every attempt is scored automatically, from line placement and tautness to how clean the approach was and whether you kept it collision-free, with bonus points for pulling it off in real wind and current. Prefer to just practice? Turn the timer and scoring off and dock at your own pace. It plays with a keyboard, a mouse, a game controller, or right on a tablet. It’s the kind of repetition that turns “I think I can dock this thing” into knowing it.

We built The Boat Docker because the next generation of boaters deserves better than trial-by-error at the fuel dock. Practice the hard part first, on your own screen, from above and from the helm, as many times as it takes. Then go dock it for real.

Try it free — no download required.

Please email your questions or comments to theboatdocker@gmail.com
Happy Boating!