
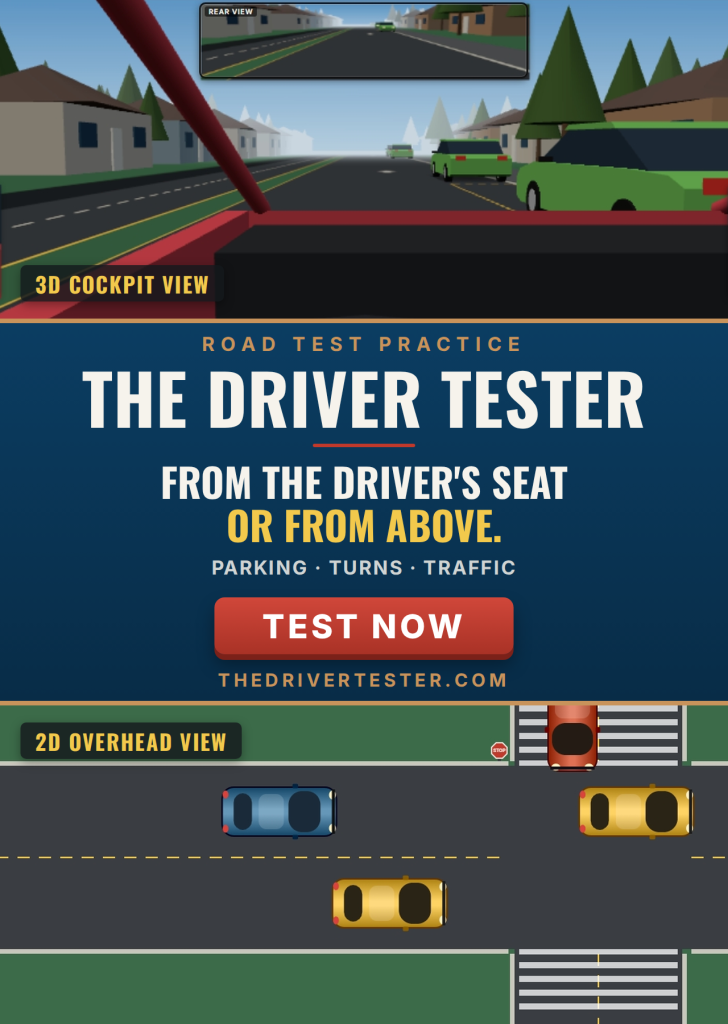
Everyone remembers their road test, especially the parallel parking. The Driver Tester is our newest simulator, built to let you practice the maneuvers an examiner actually grades before you’re sitting in the car for real.
Seven scenarios are live: Parallel Parking, Three-Point Turn, Turns in Traffic, Driving in Traffic, Slippery When Wet, Changing Lanes, and Defensive Driving. Before you start, pick your vehicle: a Small Car, an SUV, or a Small Pickup. This isn’t cosmetic. Each one has its own length, width, and wheelbase, so a bigger rig turns wider and makes the same curbside space harder to hit.
Once you’re behind the wheel, it’s a full instrument cluster, not just an on/off toggle. Turn the ignition and let the engine settle to idle, then shift into D, N, or R. Try it while you’re still rolling or above 1,500 RPM and the dashboard warns you instead of grinding the gears. Steer with a three-turn, lock-to-lock wheel, and work the pedals for proportional gas and brake, just like a real car. Drive with the keyboard, the mouse, or a connected game controller.
Now You’re Actually in the Driver’s Seat
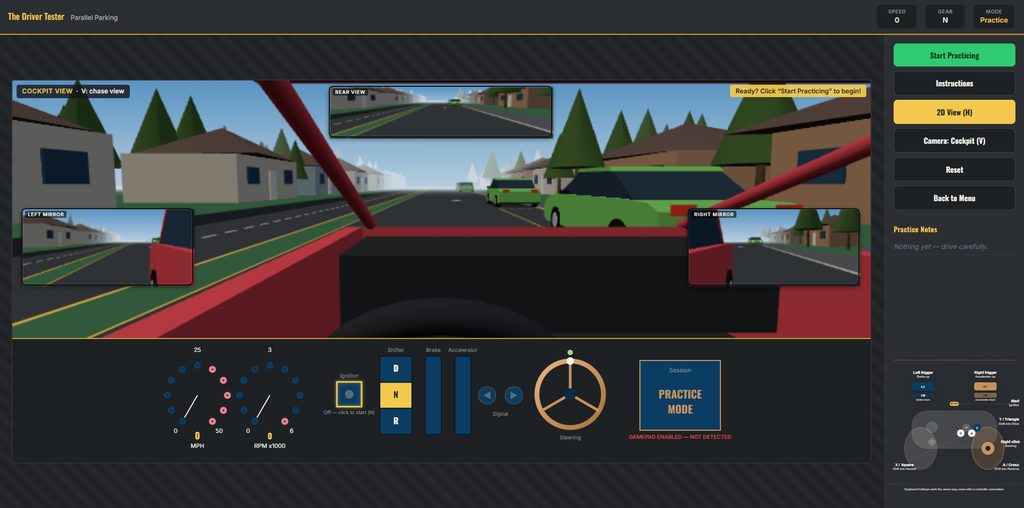
Every scenario now opens in a full 3D view from behind the wheel, with the same mirrors you’d be checking on a real road test.
- Mirrors that work. A live rear-view mirror sits at the top of the windshield, and both side mirrors show what’s beside and behind you, including a sliver of your own car so you can judge distance the way you would for real.
- A backup camera in Reverse. Shift into R and a backup camera appears on the dash, with guide lines that bend as you turn the wheel to show where the car is headed. It’s a huge help in Parallel Parking and the Three-Point Turn, where knowing which way to turn while backing is half the battle.
- Shoulder checks. Hold A or F to glance out the side windows (it springs back when you let go), or drag the view to look around. Checking your blind spot before a lane change is now something you actually do.
- Your car, your cockpit. The Small Car, SUV, and Small Pickup each get their own cab and seat height, and the steering wheel turns with yours.
- The whole scene in 3D. Parked cars, traffic, stop signs, traffic lights (with the live signal lit), the SLIPPERY signs, the pedestrian, and a braking car’s brake lights all appear in 3D, on the same road you’d see from above.
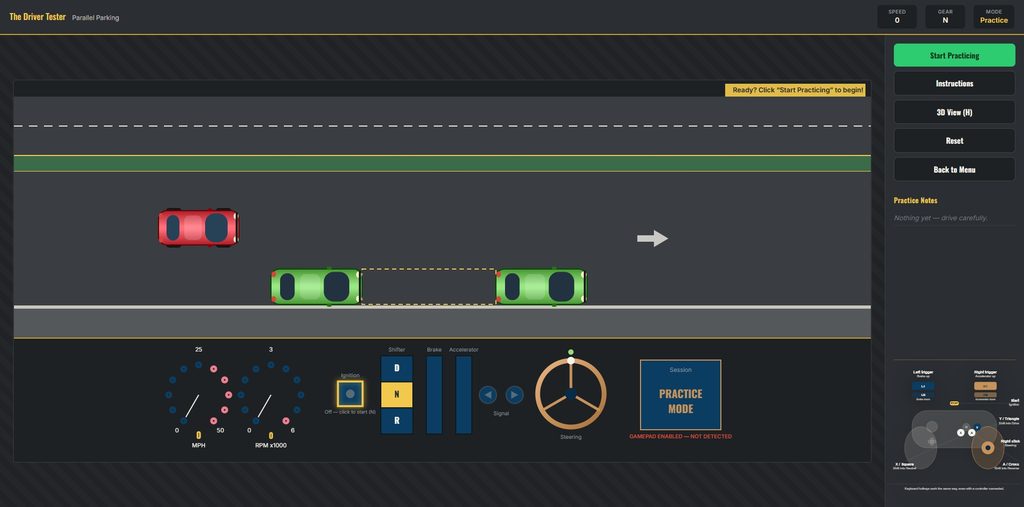
Press V to switch between the cockpit and a chase camera behind the car, and press H any time to go back to the classic overhead 2D view. On a controller, the View button switches between 3D and 2D, B changes the camera, and the left stick looks around.
The 3D view is simply another way of seeing the same simulation. The physics, the faults, and the scoring are identical whichever view you drive in, so practice however you learn best.
Think you’ve still got it? Pick your vehicle and find out.
How Scoring Works in The Driver Tester
Every scenario in The Driver Tester runs the same way: one continuous five-minute session, and the question is simply how many points can you score before the clock runs out? You need 100 cumulative points to pass, the same threshold in all seven scenarios. One clean maneuver is worth up to 100 points on its own, so a single perfect park passes outright, and several decent ones can add up to it too.
The five-minute clock only starts once you click the start button (Start Practicing, Start Driving, or Start this Turn), so starting the engine and getting settled beforehand doesn’t cost you any time.
The basic idea: faults live, each maneuver scored on the spot
Every scenario runs on the same scoring engine, and it comes down to two kinds of events:
Faults get deducted the moment you make them. Clip a curb, hit a parked car, run a red light, tailgate: the points come off immediately and show up in your fault log in real time, so you always know where you stand.
Each completed maneuver is scored automatically, the instant you finish it. There’s no button to click. The moment you’re stopped in the space, turned around, through the turn, around a lap, settled in your new lane, or through a hazard, that maneuver is graded and its points are banked. Then you just keep driving, and the next one scores fresh.
Your live score is the running total of every fault and every scored maneuver so far, floored at 0. When the five minutes are up, that total is your final result.
Each scenario grades its maneuvers on the same four-category shape (completion, precision, positioning, and efficiency), re-keyed to whatever that maneuver actually tests. Here’s the breakdown for each one.
Parallel Parking
Reverse into a curbside space between two parked cars. Each park is scored the moment you’re fully in the space and stopped; pull back out and park again to score again.
- +40: parked fully within the marked space, with no faults active
- +20 / +10: aligned parallel to the curb, within 8° / within 18°
- +20 / +10: good / acceptable distance from the curb
- +20 / +10: did it in 3 or fewer / 5 or fewer direction changes (pull-ups) since your last park
- −15: each collision with a parked car
- −10: each curb strike, and each time you leave the roadway
Three-Point Turn
Reverse direction on a narrow residential street. It’s deliberately too tight for any vehicle’s turning radius, so you have to reverse at least once. Each turnaround scores the moment you’re facing the other way.
- +40: ended up facing roughly the opposite direction (within 30° of a clean 180) and back on the road, no faults active
- +20 / +10: facing squarely / roughly the opposite direction (within 8° / 18° of exactly 180°)
- +20 / +10: ended well / reasonably centered in the lane, not hugging a curb
- +20 / +10: did it in 2 or fewer / 4 or fewer direction changes (2 or fewer is a textbook three-point turn: pull forward, reverse, pull forward again)
- −15: hitting the mailbox
- −10: each curb strike, either side
Turns in Traffic
Judge a safe gap in oncoming traffic and turn left at a signalized intersection. Each turn scores the moment you’ve cleared the intersection into the cross street.
- +40: completed the turn facing roughly the right direction (within 30° of due north), landed in the cross street, never collided with traffic, and didn’t run the red light
- +20 / +10: facing squarely / roughly north once the turn is done (within 8° / 18°)
- +20 / +10: landed cleanly / reasonably close to centered in the correct lane of the cross street
- +20 / +10: took a safe (3.0+ seconds) / workable (1.5+ seconds) gap in oncoming traffic, judged the instant you cross the centerline
- −40: colliding with an oncoming car (you’re sent back to the start line to try again)
- −15: entering the intersection on a red light (this also cancels that turn’s +40)
- −10: leaving the roadway
Driving in Traffic
A continuous drive rather than a single maneuver: keep your distance and hold your lane. Each lap of the road is scored as you complete it.
- +40: completed the lap without a serious incident (no collision, no curb strike, never off the roadway)
- +30 / +15: stayed centered / mostly steady in your lane, on average over the lap
- +30 / +15: kept a clean / mostly clean following distance (zero, or 2 or fewer, tailgating faults during the lap)
- −40: colliding with another car (you’re sent back to the start line to begin the next lap fresh)
- −15: colliding with the stopped car waiting at the cross street’s stop sign
- −10: leaving the roadway
- −10: following too closely (continuous tailgating only logs once every few seconds, not every instant)
Slippery When Wet
The same drive as Driving in Traffic, with the same scoring, on a road with three wet patches that cut your tires’ grip. There’s no separate “wet patch” score: the patches just make it easier to slide off the road, close up on the car ahead, or hit someone, and a clean lap correspondingly harder to bank. Slow down before the SLIPPERY signs.
Changing Lanes
Signal, pick a gap, and move over. Each lane change scores the moment you’ve settled, driving straight again, in the new lane. Change your mind halfway and swing back, and nothing is scored or penalized.
- +40 / +10: signaled the correct direction at least half a second before you started across, and completed the change without a fault / completed it cleanly but without the right signal on in time
- +20 / +10: took a safe (3.0+ seconds) / workable (1.5+ seconds) gap in the target lane, judged the instant you start across
- +20 / +10: settled centered / reasonably close to centered in the new lane
- +20 / +10: crossed decisively (1.2 seconds or less) / without taking too long (2.5 seconds or less)
- −40: colliding with another moving car (you’re sent back to the start line)
- −15: colliding with the stopped car at the cross street’s stop sign
- −10: leaving the roadway
- −10: following too closely
- −10: lingering across the lane line for more than 3 seconds
Defensive Driving
Drive normally, and every 12 to 25 seconds something goes wrong: the car ahead brake-checks you, a pedestrian darts off the shoulder into your lane, or the car at the stop sign pulls out in front of you. Each of these opens a six-second reaction window, and your reaction is scored when it closes.
- +40 / +15: got through the reaction window without a fault / got through it, but with one
- +20 / +10: already had a safe (3.0+ seconds) / workable (1.5+ seconds) following gap when the hazard started. This is anticipation: it’s judged before you can react, so a good following habit pays off and tailgating costs you, however quick your reflexes.
- +20 / +10: braked under control (peak brake 60% or less) / hard but not floored (under 90%)
- +20 / +10: if you swerved into the other lane, took a safe / workable gap to do it. If you never needed to leave your lane, you get the full +20.
- −80: striking the pedestrian (you’re sent back to the start line)
- −40: colliding with another moving car, including the stop-sign car once it has pulled out (you’re sent back to the start line)
- −15: bumping the stop-sign car while it’s still waiting
- −10: leaving the roadway
- −10: following too closely
A couple of things worth knowing
Repeated continuous contact (sitting on a curb, leaning on a parked car) doesn’t spam your fault log every instant. Each fault logs once per new contact, only the moment you make it.
A collision with moving traffic is the most expensive mistake on the road, but it doesn’t end your session. It costs you the points, sends you back to the start line, and any maneuver or reaction you were in the middle of goes unscored. Then the clock keeps running, and you can still drive your way back to 100.
Running out the clock is never a fault. It’s just the end of your session, and whatever total you’ve built by then is your final score. Pausing freezes everything (the clock, the traffic, and the scoring) until you resume.
Pick your vehicle, check your mirrors, and see if you’d pass. No download required.
Please email your questions or comments to theboatdocker@gmail.com